The Apple iCloud is an impressive tool for backing up iPhone storage. However, it is also a black box in which you cannot edit the content or delete selected content. Fortunately, there is a way to back up your photos to your OneDrive account. In OneDrive, you can organize your backup, prune the files, and share photos from the backup itself--keeping your phone storage clear for more photographic and video memories.
Purpose: These instructions are for adjusting the iPhone settings to back up photos and videos to OneDrive, instead of iCloud.
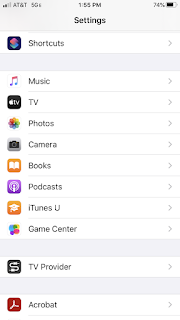
- Open the Settings App.
| |
-
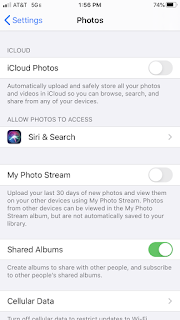
Locate the Photos app in the list of app settings.
- Click on the Photos app settings.
|
|
-
Turn off the iCloud Photos back up.
- This will complete the preparation of the Photos app.
NOTE: The My Photo Stream setting may need to be turned off. It may interfere but I have not tested to see if this function of the iCloud is dependent on the iCloud backup.
| 
|
Adjust the OneDrive Settings
|
|
-
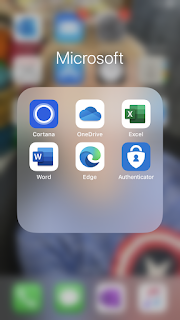
Find the OneDrive app on your iPhone.
- Click on the app's icon.
- The app will open.
|
|
-
If you have not already logged into your OneDrive account, you will be prompted to login.
- You need to open the account settings of your OneDrive app.
- The account settings icon is on the upper left.
- In the pictured example the icon is the "JL" circle by the word "Files.
- Click on the icon.
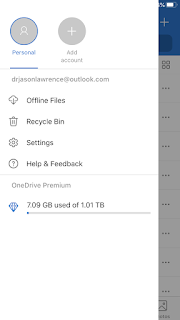
- The account settings options will slide out over the screen.
|
|
-
This slide page lets you choose which OneDrive account you want to access.
- The pictured example only has one OneDrive account.
- Click on the Settings option.
|
|
-
Click on the Camera Upload setting.
|
|
-
Turn on the camera upload for your OneDrive, identified by your outlook email address.
- Click on Include Videos so camera upload will back up videos and photos together.
NOTES: Use Mobile Network is an option that will your data upload over both wi-fi and cell data transfer. If you leave it off, the camera upload will only happen on wi-fi. Organize New Uploads lets you choose how the camera upload will be organized in the OneDrive pictures folder. This example organizes the uploads by month.
|
|
Delete OneDrive Pictures
|
|
- The camera upload sends all iPhone pictures to the Pictures folder.
- Open the Pictures folder.
|
|
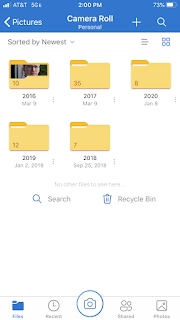
- The camera upload sends all iPhone pictures to the Camera Roll folder.
- Open the Camera Roll folder.
|
|
-
Click on the year you want to manage.
- Your screen may differ if you used the Organize New Uploads setting to organize in another way than monthly.
- In the pictured example, I will click on the 2020 folder.
|
|
-
The folders are numbered by month.
- Click on the numbered folder you want to manage.
|
|
-
Select the pictures and videos you want to delete.
- Click on the "..." button, on the top right of the interface, to open the management options.
NOTE: If you simply wish to share the pictures, you can share directly from OneDrive. Click the Share button to send the pictures to people with another app.
|
|
-
Click on the Delete button to delete all the selected pictures and videos.
|
|
-
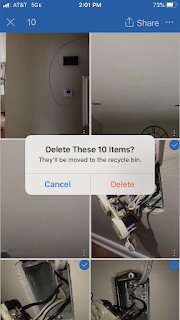
OneDrive wants to confirm you really wish to delete the pictures and videos you selected.
- Click the red Delete confirmation button.
- The pictures and videos are now deleted from your back up.
Note: Untested. If the photos and videos are not deleted from your iPhone, then camera upload may upload them again.
|
|
All instructions and documentation written by:
Dr. Jason Lawrence, M.S., Ph.D.
Theory and Practice of Professional Communication


