Monday, September 2, 2019

Save a Duplicate Word File in OneDrive

While shared documents are designed to track changes and designed to facilitate dozens of editors, it is worth making sure the original copy is readily available. These instructions help you open the original copy and save your own version of the document in the same shared folder.

Purpose: Save As your own version of the document in the same shared folder.


  1. Log in to your Microsoft office account.
  2. Click on the grid icon in the upper left corner of the Office browser screen.
  3. Click on the OneDrive link from the drop down menu.


Jason Lawrence documentation hub


  1. Before you select the file you need, you may need to search through your files first.
  2. Review the list of folders in your OneDrive storage.
  3. Click on the folder you need.
Your folder will be titled differently than this example. This example features "316_fall19_studentwork" as the folder.
Jason Lawrence documentation hub

  1. Review the list of files in your OneDrive storage.
  2. Click on the file you need.
Your folder will be titled differently than this example. This example features "316_fall19_studentwork" as the folder.

Jason Lawrence documentation hub


IMPORTANT: Do not alter the original document.

  1. Once the file opens, click on the File option from the menu bar.
Jason Lawrence documentation hub


  1. The interface will change so that there are many File options.
  2. Select Save As from the blue column of options.
  3. Once you click on Save As, the save options will display.
  4. Click on Save As from the new set of options.
Jason Lawrence documentation hub


  1. A dialogue window will open, with the name of the original file already highlighted.
Jason Lawrence documentation hub


  1. Use appropriate naming conventions to rename the file as your own copy.
  2. Click the Save button at the bottom of the dialogue window.
Jason Lawrence documentation hub

  1. You will see your own copy of the file listed along with the original in the shared folder.
Jason Lawrence documentation hub

All instructions and documentation written by:

Jason Lawrence documentation hub

Dr. Jason Lawrence, M.S., Ph.D.

Theory and Practice of Professional Communication
Artificial Intelligence writers, Internal Documentation, and Emergent Texts
Visit my Official Blogmy LinkedIn profileor my Web Page.

Jason Lawrence documentation hub

Find a School: Southern Connecticut State University

Wednesday, May 8, 2019

Check on Feedback for a Blackboard assignment

After you complete an assignment on Blackboard, you may wish to see any details that your professor has set as "visible." The visibility of assignment details is at the discretion of your professor and you must take that up with him or her. While visibility and the kinds of assignments differ greatly, the following procedure is roughly what you will want to follow.

Purpose: Review answers to an assignment and read any of the instructor's feedback.


  1. Click on the triangle next to your name on the top menu. In this example, the student name is greyed out.
  2. A dropdown menu will open.
  3. Click on the My Grades icon.
Jason Lawrence documentation hub


  1. Scroll through the assignment selections to find the assignment you wish to review.
  2. The selection will show a highlight as the mouse hovers over it. However, the mouse icon will likely stay an arrow, rather than a finger for a hyperlink. 
  3. Regardless of the icon you see, click the selected box anyway.
Jason Lawrence documentation hub


  1. You will see some data about the selected assignment.
  2. Search the screen for the score you earned on the bottom right.
  3. If you do not have a score, that means the assignment is not graded and you will not be able to view it.
  4. Click on the score to access the assignment details and feedback.
Jason Lawrence documentation hub


  1. You will see the assignment details. These details are dependent on the information your professor wants you to see, after the submission of an assignment.
  2. In this example, the question, submitted answer, and feedback are selected as "visible" by the professor.
Jason Lawrence documentation hub


  1. Depending on the size of the assignment detail, you may need to scroll down the screen to see the feedback.


All instructions and documentation written by:

Jason Lawrence documentation hub

Dr. Jason Lawrence, M.S., Ph.D.

Theory and Practice of Professional Communication
Artificial Intelligence writers, Internal Documentation, and Emergent Texts
Visit my Official Blogmy LinkedIn profileor my Web Page.

Jason Lawrence documentation hub

Find a School: Southern Connecticut State University

Tuesday, April 30, 2019

Creating Surveys with Office

There are occasions where additional primary research is required for a project. While professional researchers must comply with a formal review process for approving research that involves human subjects, a student who wants to add some survey results to a class paper shouldn't have any problems. These instructions are for individuals with access to Microsoft Office 365 and the Office app Forms.

Purpose: Create a survey using the Microsoft Office 365 Forms app.


There are two ways to start.

The first is to access Forms from the MYSCSU screen.
Jason Lawrence documentation hub
The second way to access Forms is from the dropdown app menu available on the top left corner of the browser screen, in most Office 365 apps.
Jason Lawrence documentation hub

On the forms page, there are very few options.

  1. Make sure the My forms tab is selected.
  2. Select New Form.
Do not select New Quiz because that will not allow you to create a survey.

Jason Lawrence documentation hub

The new form has a place for a title and a button for adding new questions.


  1. Click on the title field to customize the title.
  2. Enter a description is an optional field.
  3. Click Add new to add the first question to the survey.
Jason Lawrence documentation hub

Any of the four kinds of survey questions are good options for a class survey.

  • Choice lets you create multiple answers from which a survey subject can choose.
  • Text lets you create an open field in which a survey subject can write their own answer.
  • Rating is a way for you to propose a situation, product, or opinion that you want survey subjects to evaluate.
  • Date is for questions to which the answer is a preferred date. This survey might even be a way to collaborate on schedules when planning meetings.
Jason Lawrence documentation hub
For the purposes of these instructions, I selected the Choice option.

  1. Enter the question in the question field.
  2. Each question automatically comes with two default answer fields:  Option 1 and Option 2. 
  3. Write your own words to replace the text "Option 1" or "Option 2."
  4. Click Add option to add over three options. In the picture, I created four optional answers.
Jason Lawrence documentation hub

Forms will always automatically save the form. You can identify the status of the saved form. Below the top menu bar, in the top right of the screen is a status update. The status of my example reads "Saved."
Jason Lawrence documentation hub
Optionally, you can click on the Theme tab to select from among preset themes.
Jason Lawrence documentation hub
To complete your survey, you need to distribute the survey to friends or student peers.

  1. Click on the Share tab.
  2. The Copy option is the default selection.
  3. Use the Copy button to copy the URL address of the survey.
  4. There are other options for distribution.
  5. Past the URL into the method you are using for distribution (i.e. Blackboard discussion post, etc.).
Jason Lawrence documentation hub

After friends and peers have answered the questions, Forms gives a real-time analysis of the answers.

  1. Open the survey.
  2. Click ont he Responses tab.
  3. Review the pie charts that represent the analysis of the answers.
  4. These instructions can help you post a link to Blackboard.
Note: My example only has one subject so there is only one result. However, the pie chart will become more dynamic when more subjects respond to the survey.
Jason Lawrence documentation hub


All instructions and documentation written by:

Jason Lawrence documentation hub

Dr. Jason Lawrence, M.S., Ph.D.

Theory and Practice of Professional Communication
Artificial Intelligence writers, Internal Documentation, and Emergent Texts
Visit my Official Blogmy LinkedIn profileor my Web Page.

Jason Lawrence documentation hub

Find a School: Southern Connecticut State University

Tuesday, February 5, 2019

Signature line

explaintheneed

Purpose: wordswordswords


All instructions and documentation written by:

Jason Lawrence documentation hub

Dr. Jason Lawrence, M.S., Ph.D.

Theory and Practice of Professional Communication
Artificial Intelligence writers, Internal Documentation, and Emergent Texts
Visit my Official Blogmy LinkedIn profileor my Web Page.
Jason Lawrence documentation hub

Find a School: Salt Lake Community College

Finding a Shared File in OneDrive

A person can share both files and folders in the same way; these instructions will picture a shared folder. Often, in my classes, I will share a OneDrive folder with the entire class. Students need to find the shared folder before they can use it. However, once they find the folder, they can save any file they want to the folder and the entire class can access the file. Therefore, if the class is sharing a Microsoft Word document, the entire class can edit that document together.

Purpose: These instructions will help people find a shared file in their OneDrive. 


Once a file or folder has been shared with you by the owner, you will receive an email. In this example, Karen Lawrence shares a folder called "shared_classfolder" with my email account.

  1. Open your Outlook email program or browser.
  2. Locate the respective email.
  3. Click on the file or folder to open it.
  4. Alternatively, click on the Open button.
  5. You can continue to open the folder from this email.
Jason Lawrence documentation hub


A second method to open a file or folder.
  1. Open OneDrive in your browser.
  2. Look for the Shared option in the left navigation bar. This link will open a list of all files and folders that are shared with you.
  3. Pictured in this example, the "shared_classfolder" folder and "presentation" PowerPoint slide deck are shared with me.
  4. Click on the "shared_classfolder" link.
Jason Lawrence documentation hub

The interface for a file depends on the file. For instance, the "presentation.pptx" file in the picture above will open in Microsoft PowerPoint. Whereas, the following image shows the interface for a OneDrive folder.

  1. Click on the New menu to create a new document in the folder.
  2. Click on Word document to create a Microsoft Word document.
  3. Your computer will automatically enerate a Word document webpage and you will see the Microsoft Word interface.
Jason Lawrence documentation hub


All instructions and documentation written by:

Jason Lawrence documentation hub

Dr. Jason Lawrence, M.S., Ph.D.

Theory and Practice of Professional Communication
Artificial Intelligence writers, Internal Documentation, and Emergent Texts
Visit my Official Blogmy LinkedIn profileor my Web Page.

Jason Lawrence documentation hub

Find a School: Southern Connecticut State University

Tuesday, January 29, 2019

Set up Bookings with Microsoft Office 365

Microsoft Office 365 for Business comes with Bookings. This feature allows a user to publish a Bookings page on their website or position a link in their email signature. With this published Bookings page, clients and colleagues can request meetings that are recorded on your Outlook calendar. Whereas only internal employees on the Outlook network can send appointment invites through Outlook, people external to the organization are unable to set Outlook appointments. However, Bookings changes that. These instructions assume you have Microsoft Office 365 for Business and access it through the employee single-signon of Southern Connecticut State University. For further instructions about creating email signatures, use this link for the relevant instructions.

Purpose: Set up Bookings in an email.


  1. Log in to the mySCSU webpage.
  2. From among the mySCSU apps, click the Bookings button.
  3. A new page with promotional information will open.


  1. Disregard all promotional materials, unless you have the desire to read more about Bookings.
  2. Click on the Get it now button.


  1. Immediately, a small dialogue box will open.
  2. Select the Add a booking calendar option.


  1. There are two fields. In the first field, write who the Bookings is for.
  2. In the second field, write what the Bookings is for.
  3. Press the Continue button.


  1. A Just a moment box will appear, with a circle animation.
  2. The amount of time you need to wait will be determined by your computer, connection speed, and browser version.
  3. Do not push any buttons while you wait for your Bookings account to generate.

  1. The Bookings home page will open with a user friendly dashboard.
  2. The large icon buttons are designed to walk you through the set up of your Bookings account.


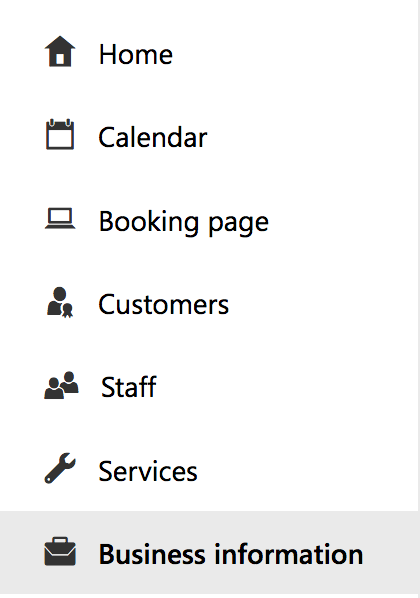
  1. Look at the vertical selection of navigation options on the left side of the page.
  2. Click on Business Information so that you can set up your Bookings profile. When people seek to set up an appointment, this information will be useful for external users to schedule their appointment.


  1. Fill in the Business Information fields with your own personal information.
  2. Fill in the Business hours with your daily availability.
  3. Whereas an internal colleague can view your outlook to schedule an appointment, an external user cannot see your calendar. It is best to identify the full range of your general availability.


  1. On the top left corner of the dashboard is a place for a picture or business logo.
  2. Click anywhere on the logo location to open an Bookings settings bar on the right side of the screen.
  3. Click Upload new logo.
  4. A file selection window will open.
  5. Navigate through your files to select the image of your choice.
  6. Click the Open button to open the image in the logo corner of the Bookings dashboard.


  1. From the left Navigation bar, select the Booking page link.
  2. The Booking page will open.
  3. There are many settings on this page that rely on other Bookings settings that are meant for businesses or departments with several employees sharing the same Bookings page.
  4. There are not any changes that you need to make to set up a personal Booking page.
  5. Press Save and publish at the top left of the Booking page.


  1. One of the panels on the Booking page changes to provide additional links for published Booking pages.
  2. For an email link, you need only copy the URL link in the Share your page text field.
  3. You can select the field, select all, and copy the URL.
  4. Alternatively, you can select the Copy button.

Open your email software or log in to your email browser for this next step.


  1. Highlight the text you want to make a link in your email. Once the email is sent, the email recipient can use the link to send an appointment invitation to you.
  2. In Microsoft Outlook, click on the button at the far right of the Messages ribbon.
  3. In other email programs or browsers, you need to find the option to create a hyperlink.


  1. The Edit Hyperlink dialog box will open.
  2. Paste the URL into the Address text field.
  3. Click on the OK button.
  4. You can complete your email, as needed, and send the email to your recipient. The user can use the link to set up an appointment with you.


All instructions and documentation written by:

Dr. Jason Lawrence, M.S., Ph.D.

Theory and Practice of Professional Communication
Artificial Intelligence writers, Internal Documentation, and Emergent Texts
Visit my Official Blogmy LinkedIn profileor my Web Page.

Jason Lawrence documentation hub

Find a School: Southern Connecticut State University